User hierarchies let you manage individual users. For example, if your company has several departments, each Team Leader or Supervisor could be responsible for the staff who work for them. This way, each Team Leader or Supervisor can only see and manage the user accounts of their own staff.

Creating a user hierarchy

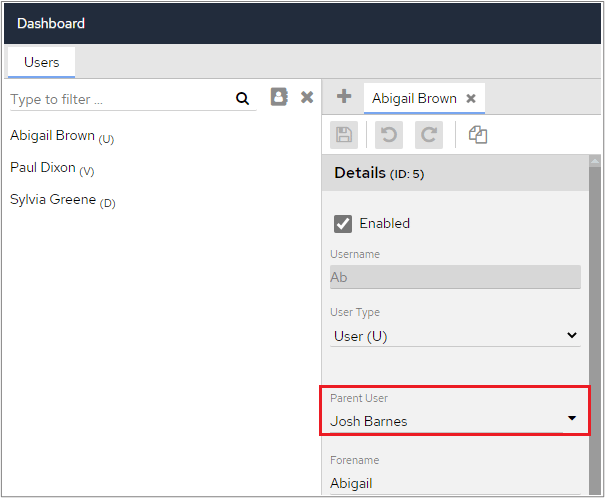
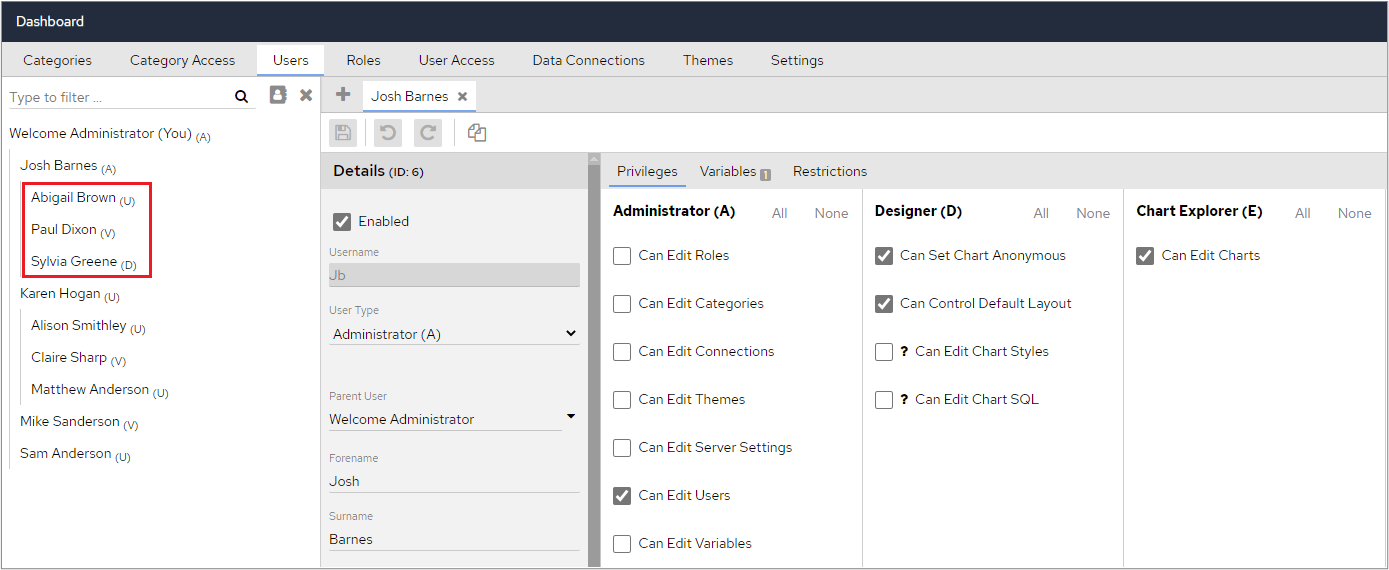
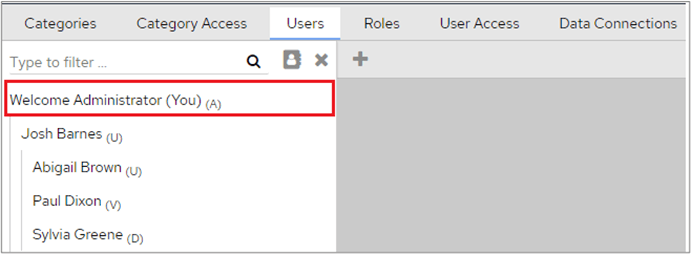
To create a hierarchy, assign individual users to a Parent User, such as their Team Leader or Manager. The Manager can have limited Administrator privileges, for example, they may only be able to edit user accounts. In the following example, Josh Barnes has been set up as an Administrator. He has several privileges, such as being able to create charts and modify layouts, but the only Administrator privilege he has is Edit Users. Administrator privileges showing only Edit User enabled To create a group of users that Josh can manage, set the Parent User for each user to Josh’s name. Remember to click the Save icon after making these changes. Setting the Parent User for individual users When Josh logs into the system, he will only be able to see the users where he has been selected as the Parent User. This example shows 3 users with Josh identified as their Parent User. When Josh logs into the system, these are the only users he can see on the Users tab. As he only has the Administrator privilege to Edit Users, he cannot see any of the other Administrator functions, such as Categories and Category Access. Users tab showing only the users Josh can manage The main System Administrator, of which there can only be one, can see all users who have access to the system and can edit any of them. System Administrator user account