Use the User Access screen to control which:
  • Categories and roles are granted to a user
  • Categories are allocated to a role
It also lets you see exactly what a user has access to as a result of this configuration. In the following screenshot, the selected user doesn’t have any categories assigned to them (the number in blue) but has been assigned to a role (the number in pink). User with no categories assigned and one role assigned There are three options in this panel. Category, Role and User. Category, Role and User options These different views let you view by:
  • Categories, and which role or user has access to a category
  • What categories are assigned to a role and which users are assigned to that role
  • Users, which roles/categories they have access to, and their overall permissions
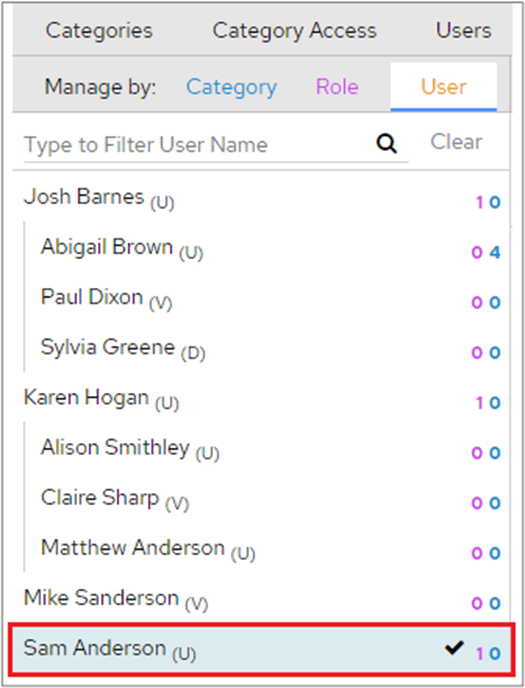
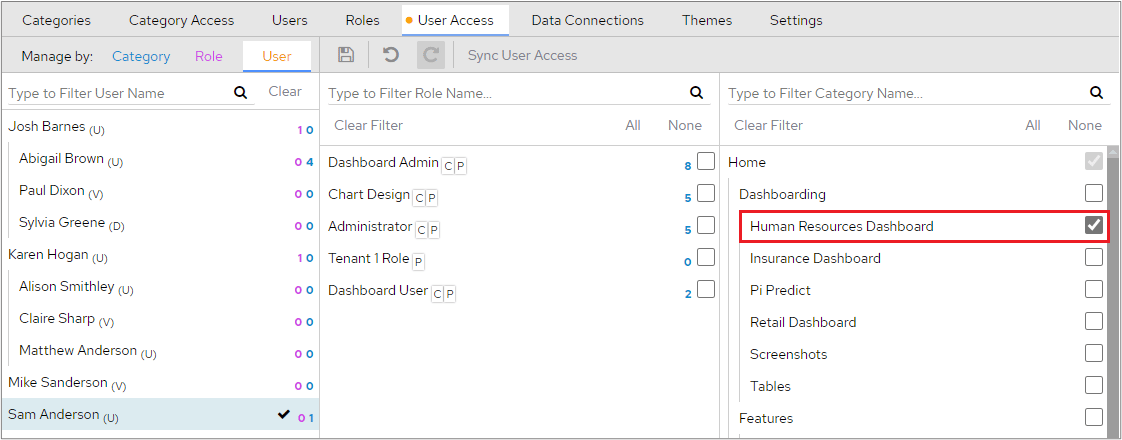
Manage by user

On start-up you’ll see a blank section on the right and the user panel on the left. To start assigning categories to users, select a user to change. As the screenshot shows, the selected user currently has no categories assigned to them, so they wouldn’t see anything if they logged into the dashboard.
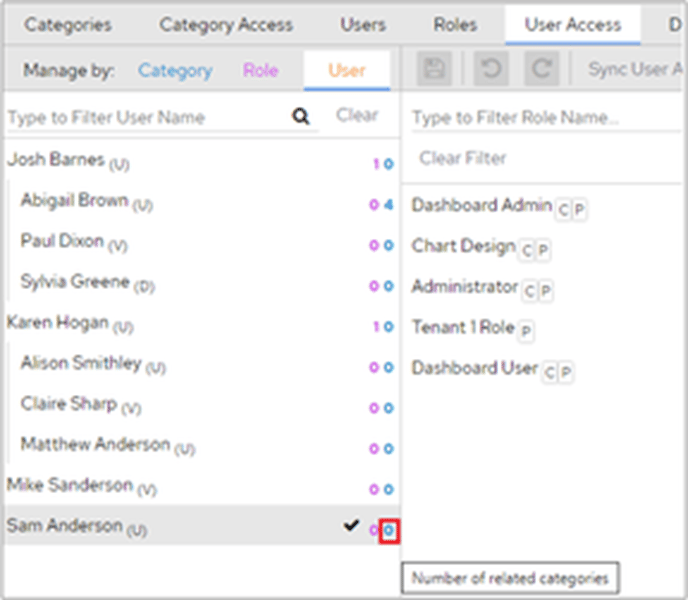
 Manage by User view with no categories assigned To assign categories to the selected user, tick each category that you want to give them access to. Assigning categories to a user by ticking each category If you see a red exclamation mark next to the selected category, it means you’ve selected a child category without also selecting its parent. This prevents the user from seeing that category until you’ve added the parent category, in this case ‘Dashboarding’. Red exclamation mark on a child category without its parent selected Once you’ve added the ‘Dashboarding’ parent category, the exclamation mark disappears, and the user can then see the Human Resources Dashboard when they log in. When you’ve selected all the categories you want the user to have access to, click the Save icon at the top of the screen. Remember that if you assign categories to users rather than assigning a role to them and you want to then give them access to additional categories, you will need to update each user account separately.

Manage by role

You can create a role with varied privileges, then assign it en masse to users to give each user the same privileges. You can use it in the same way to assign categories en masse to users. Click a role on the left-hand side of the screen. The number in blue indicates how many categories this role can see, and the number in orange indicates how many users are assigned to the role.
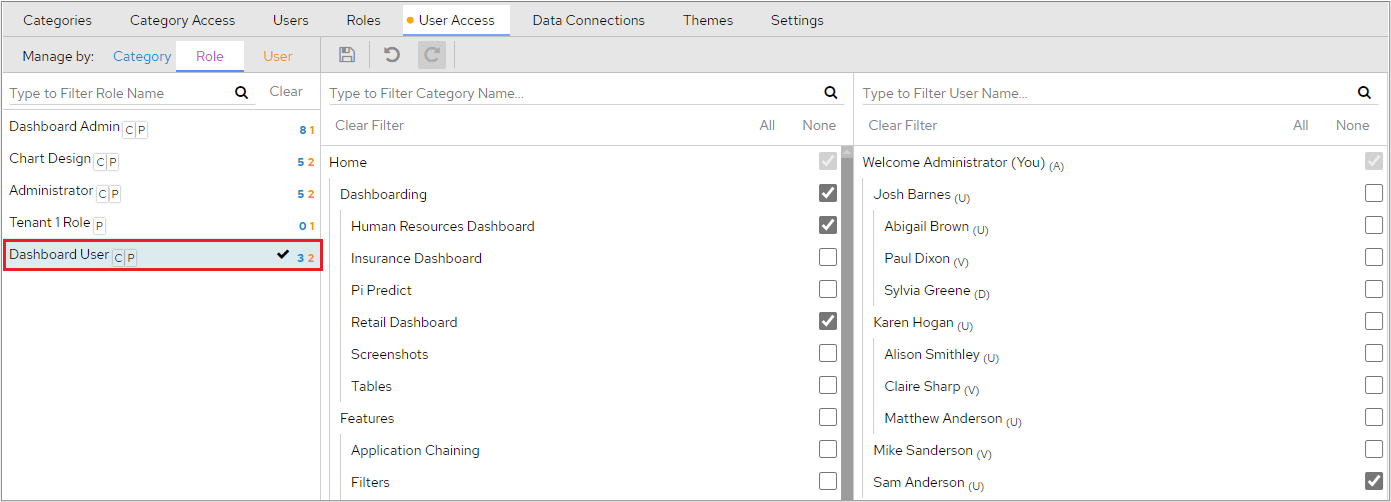
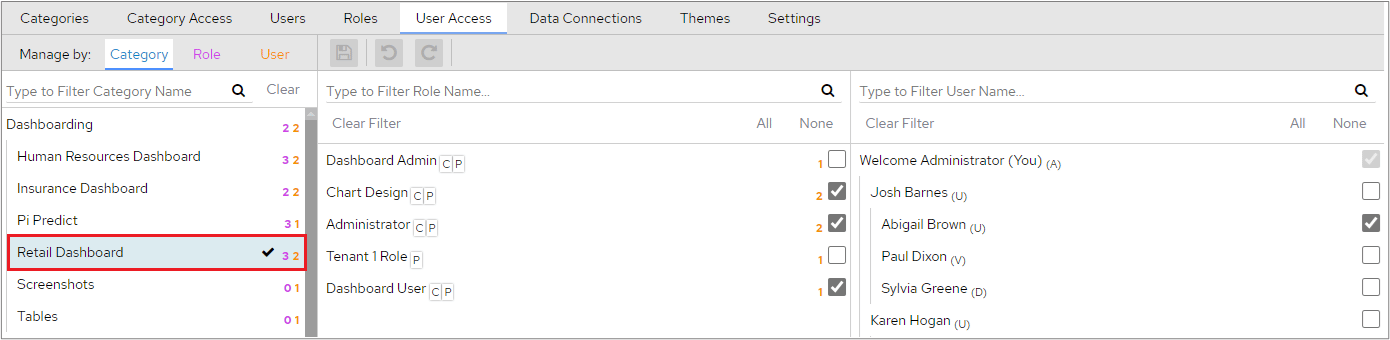
 Manage by Role view showing categories and users for a role The Dashboard User role has one user assigned to it. This means the user can access every category assigned to this role, as shown in the middle column. From this screen, you can add more users to the role, or add/remove categories you don’t want them to see.

Manage by category

This shows the breakdown of who has access to a specific category, based on role access and specific user access, and collates this information into a list of users who have access to the selected category. In the following example, there are 3 roles assigned to this category (the number in purple) and 2 related users (the number in orange). Manage by Category view showing roles and users with access