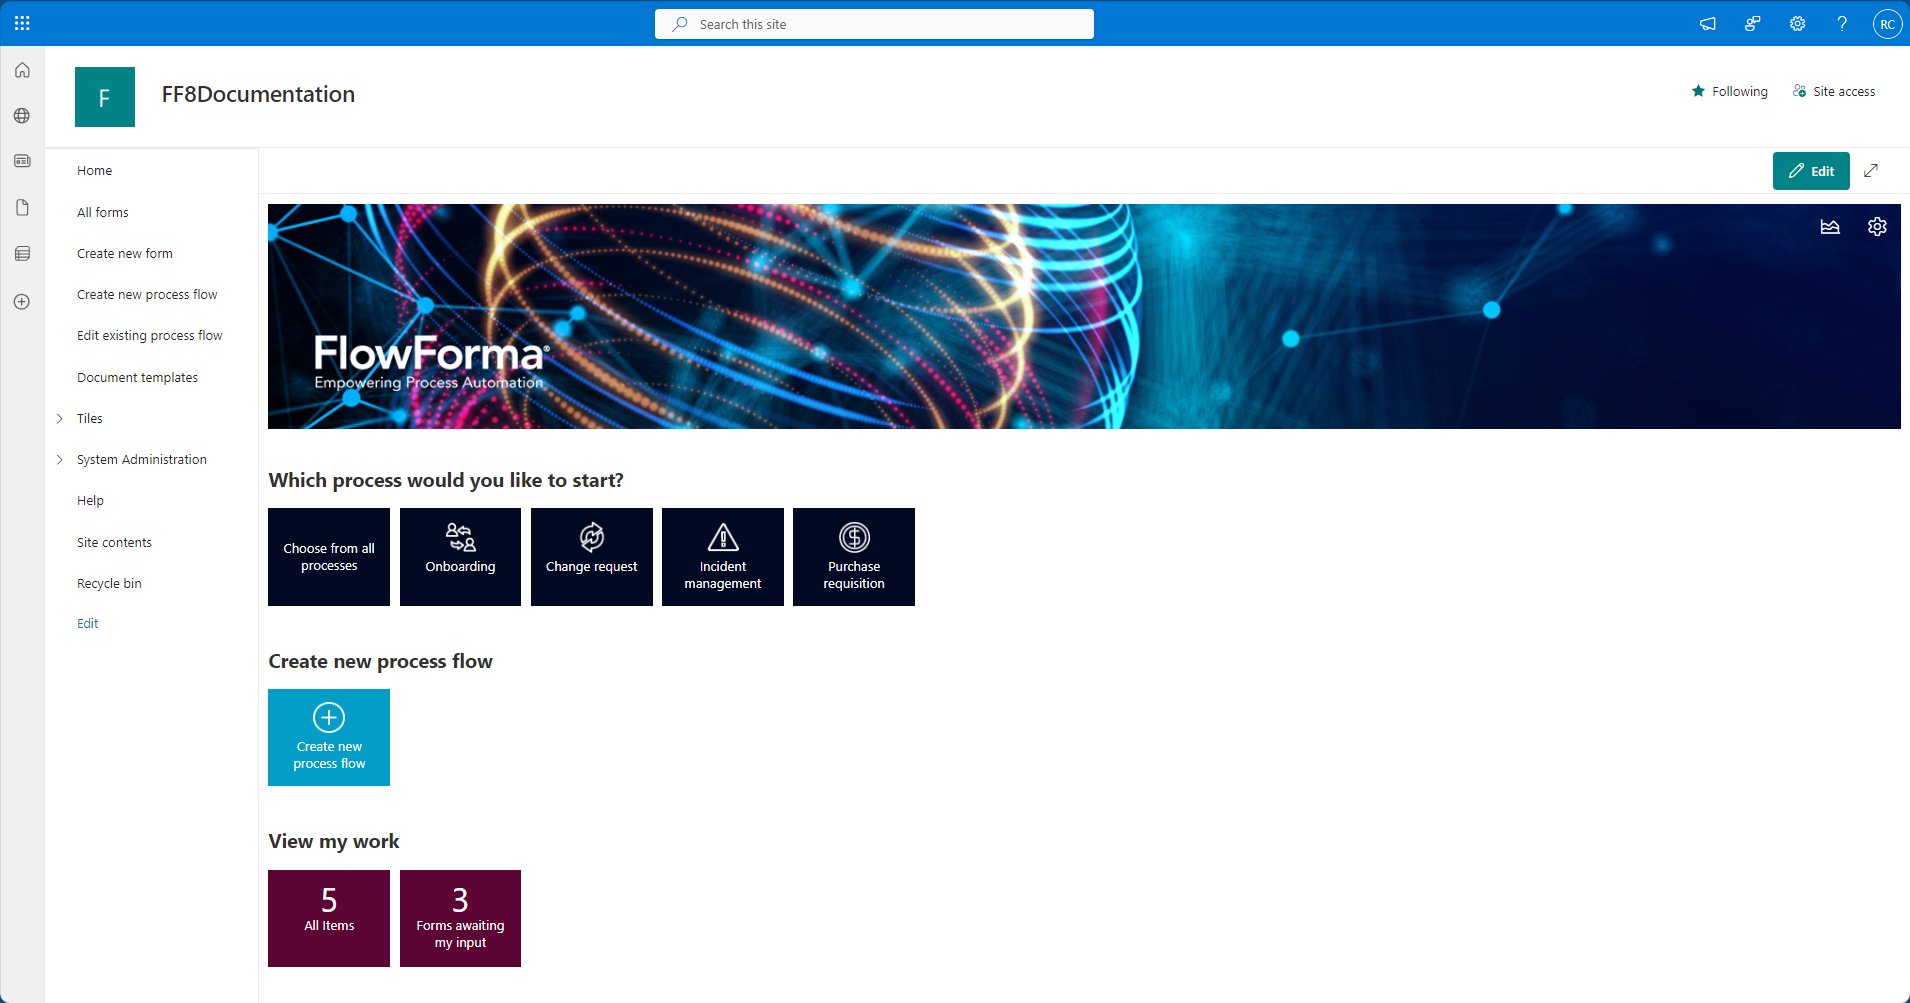
Navigation links
The left side of the screen contains the site navigation links.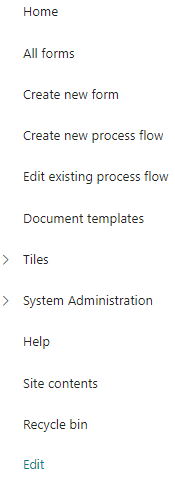
All Forms: This link opens the all forms list
Create new process flow: This link opens the dialogue to create a new process flow
Edit existing process flow: This link opens the flows list so that you can select a process to edit
Document templates: This link opens the document templates folder
Download Word plugin: This link downloads a zipped file containing the FlowForma Word document plugin, used to generate Word documents in FlowForma processes.
Tiles: This is a drop-down that contains two items
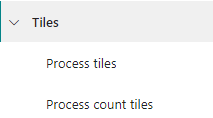
Process count tiles: These are tiles added to the homepage that display a count of forms based on views of the Forms list. Selecting the Process count tiles option lets you add or edit tiles included on the Homepage.
System Administration: This is a drop-down containing system links to various system administration lists and tasks
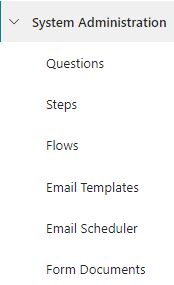
Steps: When you select this item, the Steps list is displayed.
Flows: When you select this item, the Flows list is displayed.
Email Templates: When you select this link, the Email Templates library is displayed.
Email Scheduler: When you select this link, the Email Scheduler list is displayed, showing emails that have been sent and emails that are scheduled to be sent.
Note: Sent emails are automatically deleted from this list after 14 days
Activity Monitoring: When you select this item, the Activity Monitoring screen is displayed.
I am on leave: When you select this item, the I am on leave dialogue is displayed.
Help: When you select this item, FlowForma help is displayed.
Recycle Bin: When you select this, you are directed to the site recycle bin.
Which process would you like to start?
This section contains tiles to create new process forms. If you choose to install the default templates when installing FlowForma, five process tiles are created. If you choose not to include them, only “Choose from all processes” is added. Choose from all processes: When you select this tile, the screen to select a process from all licensed flows on the site is displayedOnboarding: This is a pre-built process; when you select this tile, a new version of the form is displayed
Change request: This is a pre-built process; when you select this tile, a new version of the form is displayed
Incident management: This is a pre-built process; when you select this tile, a new version of the form is displayed
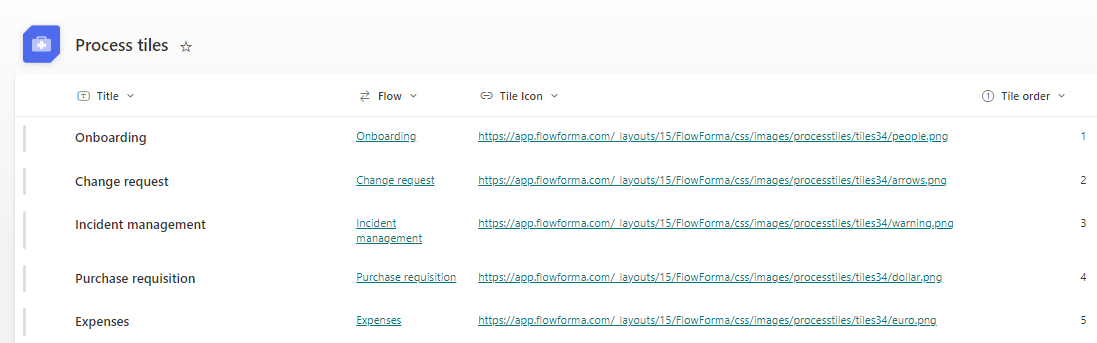
Purchase requisition: This is a pre-built process; when you select this tile, a new version of the form is displayed To add, edit, or remove process tiles, select Process tiles from the Tiles drop-down in the navigation section. The following list is displayed:
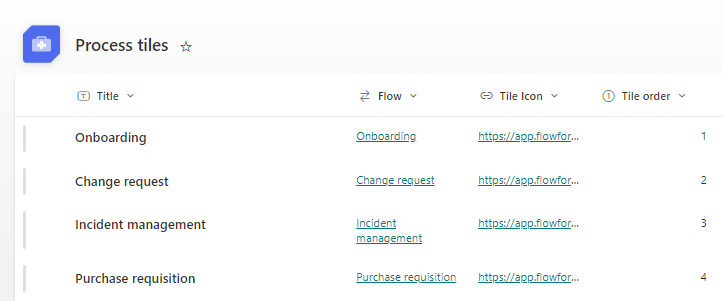
Flow: This is the flow from which the form is created when the tile is selected
Tile icon: This is the image that is displayed on the tile on the home page
Opening mode: This is how you want the form to open when you select the tile
Tile order: This sets the order in which you want the tiles displayed across the screen, from left to right; the lowest number is displayed first on the left.
Adding process tiles
To add a tile, select ’+ new item’ and add the details for the flow you wish to add.
Title: This is the text that will be displayed on the tile. It is automatically populated with the title of the flow selected, but this can be edited.
Tile icon: The tile icon is the image that will be displayed on the tile; this is a drop-down that contains a set of images that you can select from
Use custom icon: If you have your own image that you would like to display on the tile, check the checkbox and the Custom icon URL textbox is enabled.
Custom icon URL: If you want to use a custom icon, save the image to a SharePoint library on your site and enter the URL of the image here
Opening mode: When the tile is selected, you have the option to open the form in either a dialogue, in the existing browser window, or in a new browser window.
Tile order: Tiles are displayed from left to right across the screen; to order how the tiles are displayed, enter a value here. The tile with the lowest value is displayed first on the left of the screen. The list below reflects the new item that has been added:

Create new process flow tile
This tile opens the create new process flow dialogue, allowing you to create a new process flow.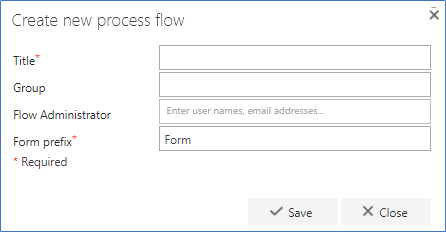
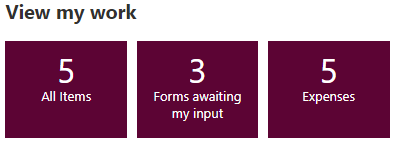
View my work
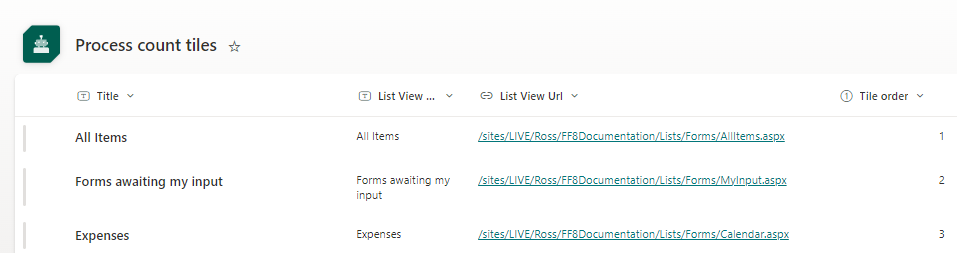
This section contains Process count tiles that are used to display the number of forms contained in filtered views of the forms list. By default, two tiles are added to this section: All items: All forms that are included in the forms listForms awaiting my input: All forms on the forms list where the current step is assigned to the currently logged-in user. To add, edit, or remove Process count tiles, select Process count tiles from the Tiles drop-down. The following list is displayed:
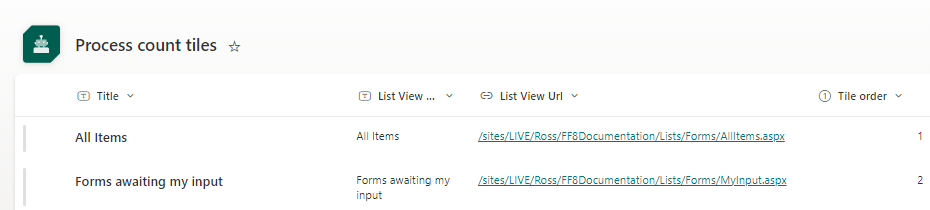
List view title: This is the title of the list view that will be used when the tile is created.
List view URL: This is the URL of the list selected above
Tile order: This sets the order in which you want the tiles displayed across the screen, from left to right; the lowest number is displayed first on the left.
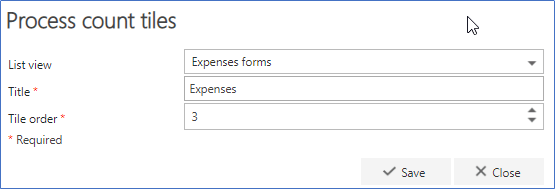
Adding a Process count tile
To add a process count tile, click ’+ new item’ and the screen below is displayed: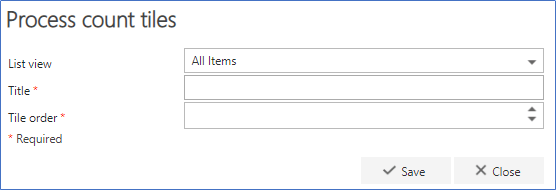
Title: This is the text that will be displayed on the tile.
Tile order: This sets the order in which you want the tiles displayed across the screen, from left to right; the lowest number is displayed first on the left.