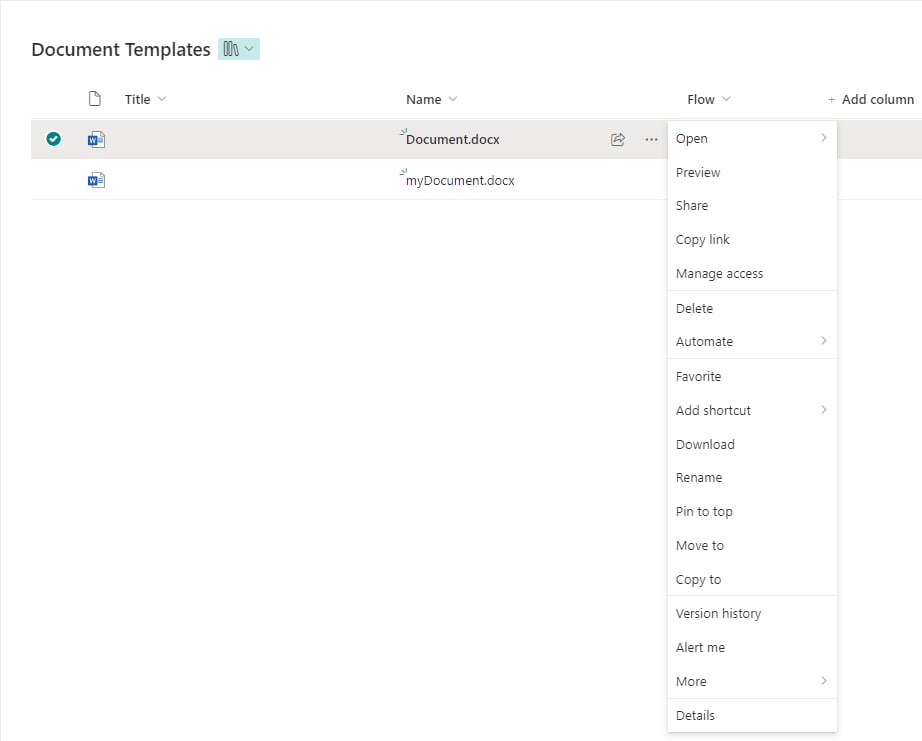
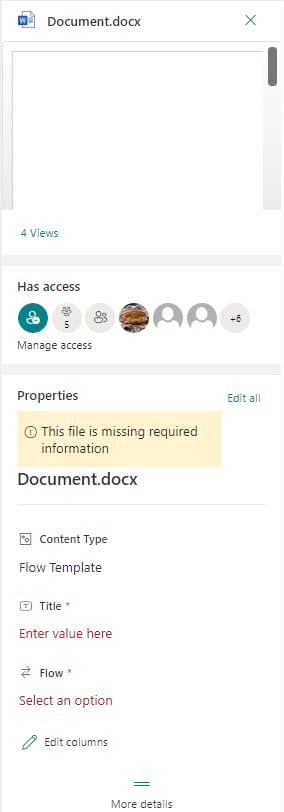
- Title: enter the name by which the document will be referenced in the system.
- Flow: select the flow you want to associate the document template to. Only one flow can be selected.
Edit document template
To edit a document template, go to Document templates and click the three dots beside the document you want to edit. Select Edit and then click OK. The document opens in edit mode.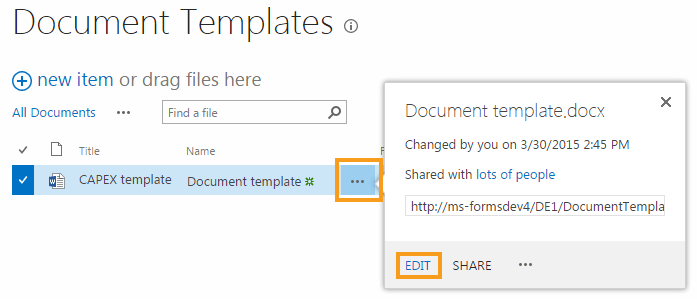


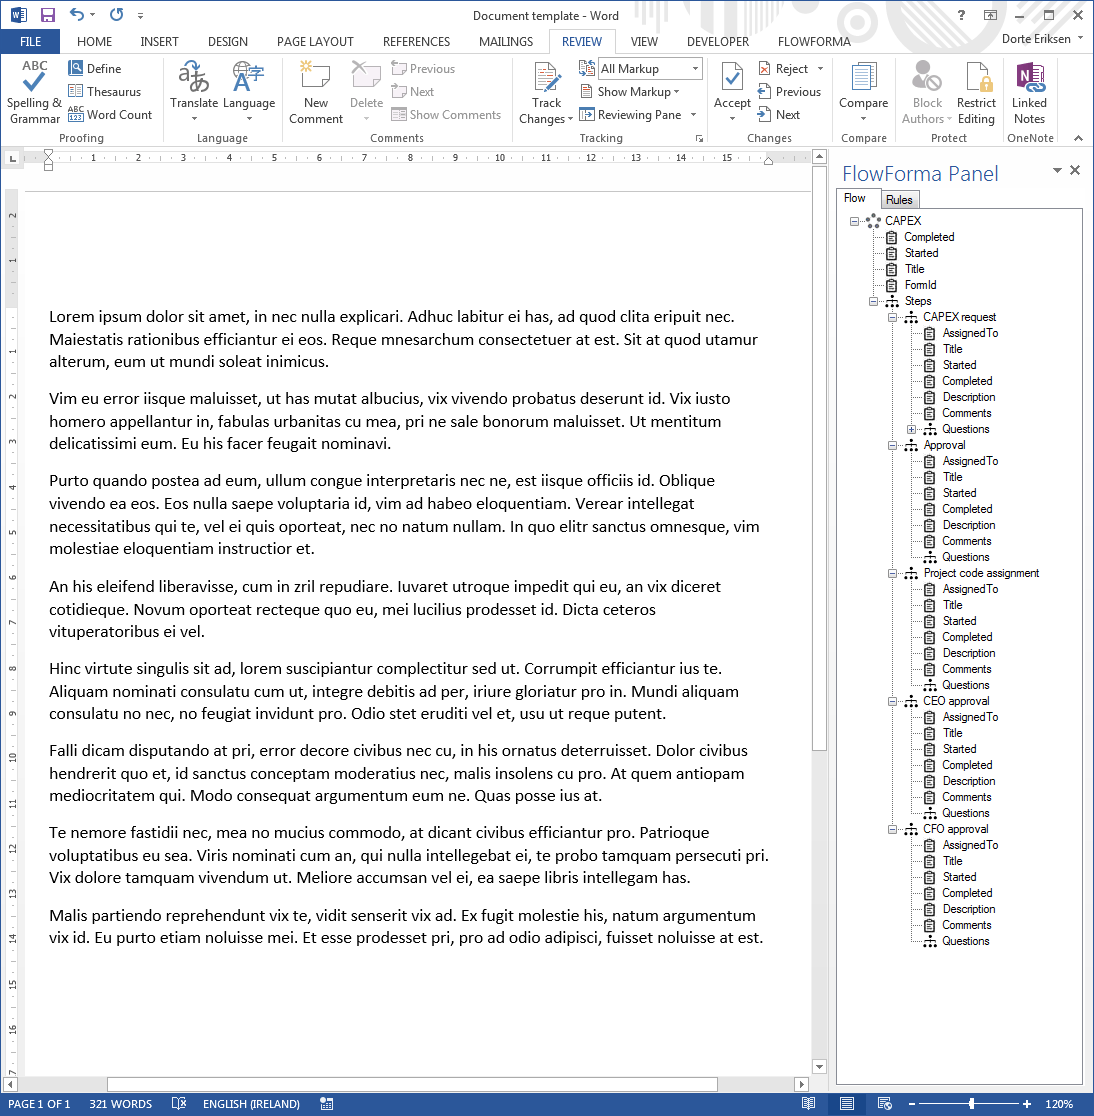
- Panel: shows a tree view of the flow on the right side of the screen (see image below).
- Validate: activates after you click Panel; use it to check whether the document is still valid.
- External fragment: activates when you click an inserted attribute in the document.
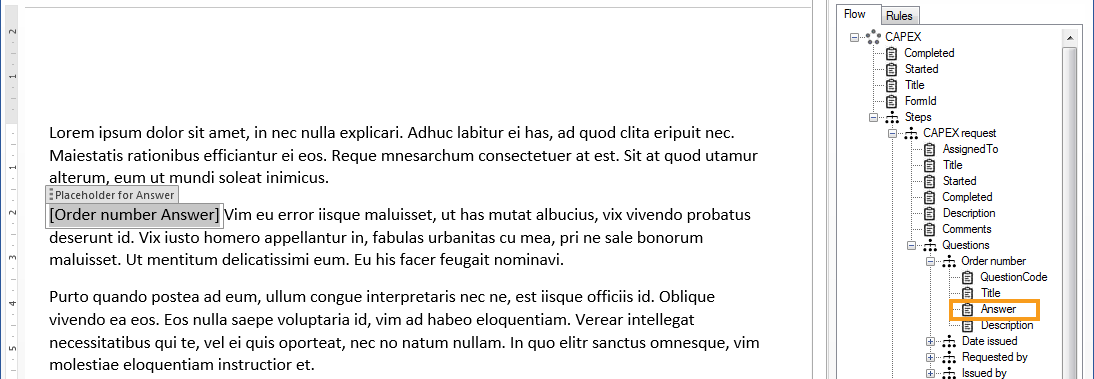
The panel
The FlowForma panel is located on the right side of the screen, and the flow elements fall into three categories:- Flow level attributes:
- Completed: the date and time when the flow was completed.
- Started: the date and time when the form was created.
- Title: the name of the flow.
- Step level attributes:
- Assigned to: the person responsible for completing the step.
- Title: the name of the step.
- Description: the text inserted in the step description in the step definition.
- Comments: the text inserted in the comments field of a step when a form is created and the step submitted.
- Question level attributes:
- Question code: the question code from the question definition.
- Title: the name of the question.
- Answer: the information entered in the form as an answer to a question (e.g. question: “New employee name”, answer: “Joan Doe”).
- Description: the text inserted in the description field of the question definition.
[ ].
Repeating table panel details
The repeating table is the only question type that includes sub-questions. If you expand the repeating table question, you’ll see a new line, “SubQuestions”. You can expand this area to see all sub-questions. Each sub-question has the same question attributes as any other question.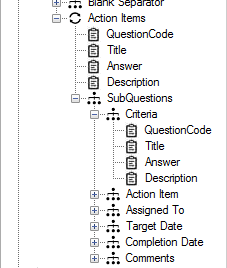


Validate
Use the Validate button to check for any inconsistencies between the document template and the flow. In the example below you can see the warning message. Data from the document that is no longer valid shows up in red, meaning the information has been deleted.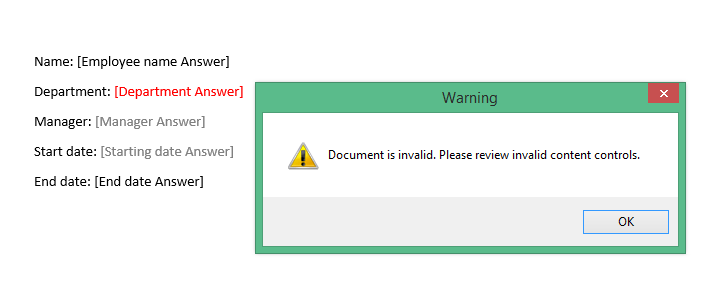
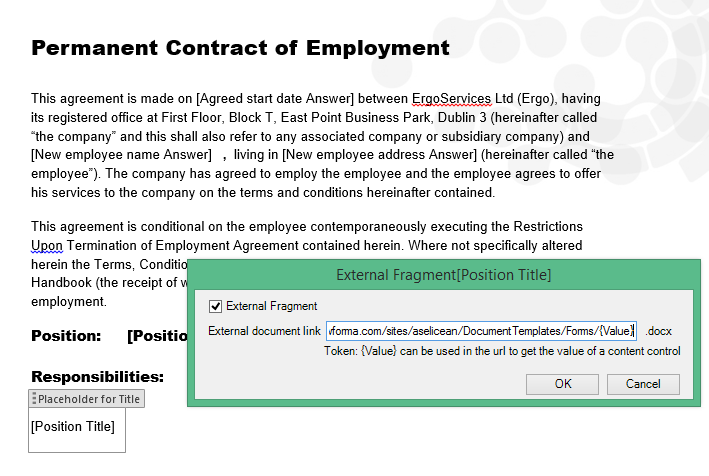
External fragments
External fragments let you dynamically generate documents based on different document templates, by referencing the document template URLs. To include a document fragment in your document template, insert a FlowForma attribute in the document. Click the attribute to activate the External fragment icon in the ribbon, then click the icon. In the window that opens, check the External fragment option and insert the link to the document template you want to use. When you insert the document URL you have two options:- If you only use one document, insert the exact name of the document.
- If you use multiple documents, you can use the
{value}token. When you use this token, the document generator automatically picks the answer of the question and maps it to the document template to be inserted in the generated document.
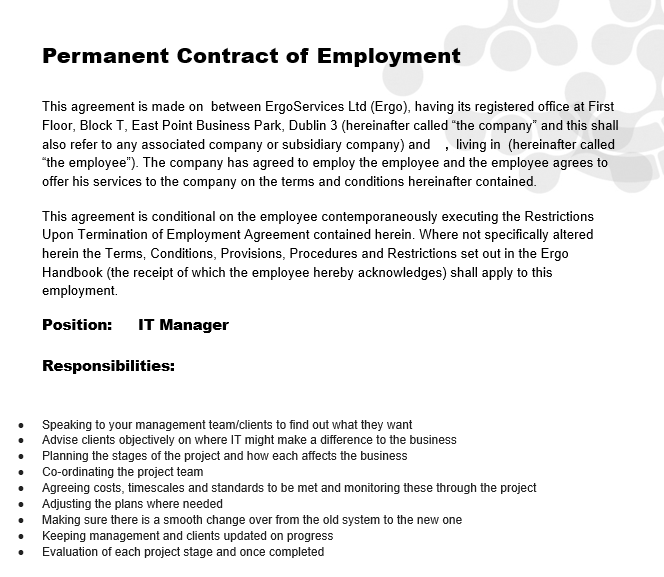
Example
In a “new employee” flow, one of the steps is to generate the contract of employment and populate it with the job description of the new employee. The target question “position” has three job titles: Business Analyst, IT Manager, and HR Assistant.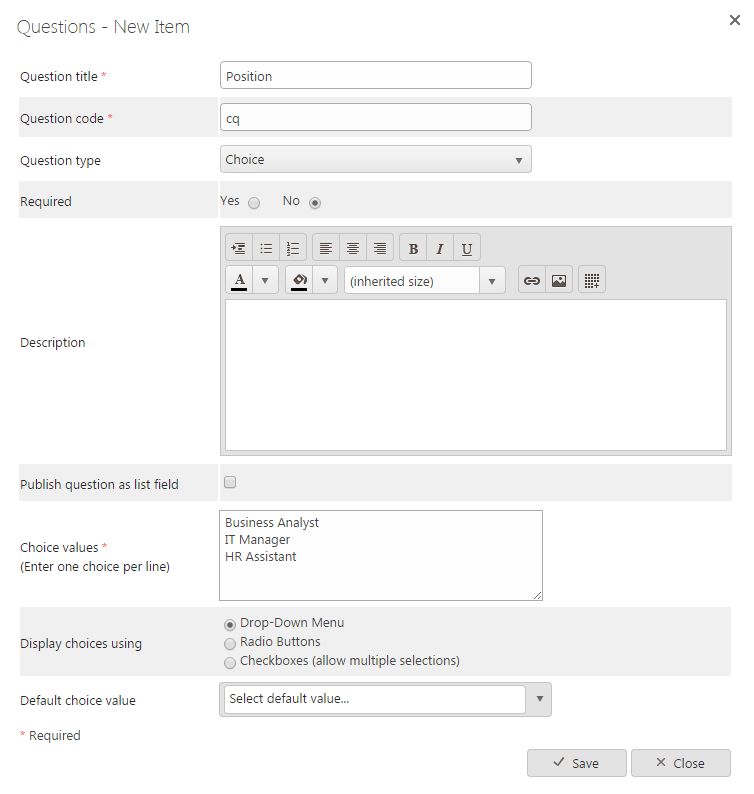
- Contract of employment template
- Business Analyst: contains the business analyst job description
- IT Manager: contains the IT manager job description
- HR Assistant: contains the HR assistant job description
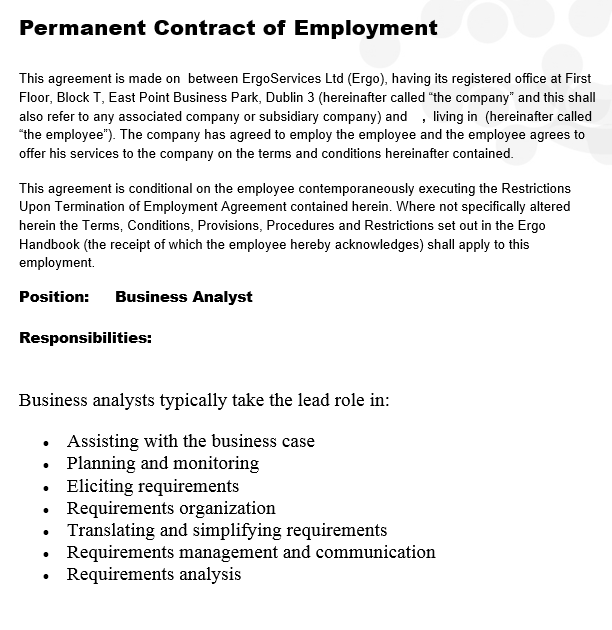
When you use multiple document templates to generate a document, it’s recommended that you use the same document formatting, otherwise the formatting won’t be consistent, as you can see in the previous two images.