Roles provide a simple way to group categories together. This makes controlling large numbers of Analytics Dashboard users with the same access requirements much easier. On this page you can create, edit, and delete roles. Once you’ve created a role, you can allocate it to users on the User Access tab. A user can have more than one role, and this doesn’t prevent individual categories from also being allocated to them. For example, say you have thirty Analytics Dashboard users who are all Sales Managers, and Sales Managers currently have access to six categories. If you create a seventh category for Sales Managers and haven’t used roles, you would need to assign the new category to each of the 30 users individually. However, if you had created a role called “Sales Manager” and assigned the six original categories to it, then assigned each of the 30 users to that role, you would only need to add the new category to the role to grant them access. Roles also let you quickly apply access controls (privileges) to a group of users. Roles tab overview

Create a role

To create a role, click the Roles tab in the configuration screen, then click the Add icon at the top of the screen.
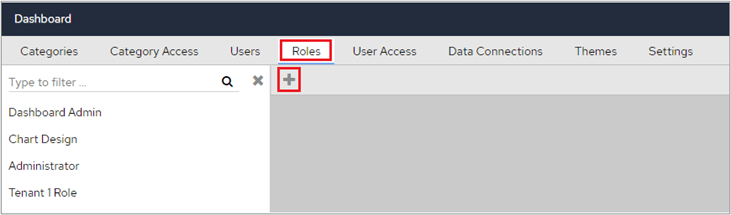
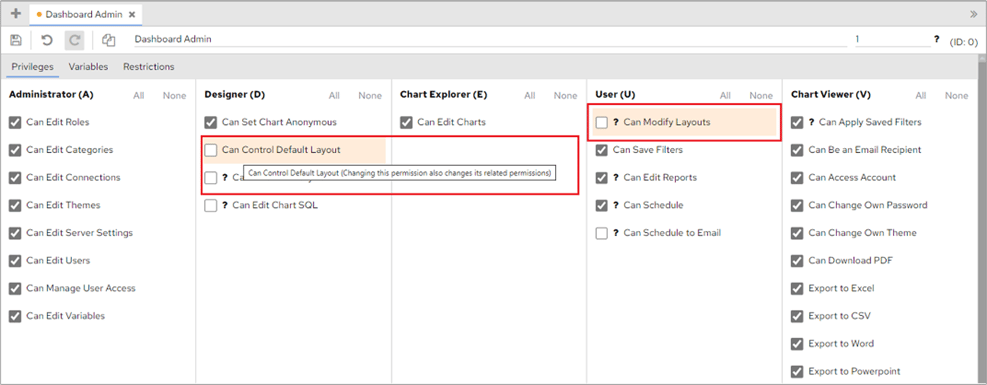
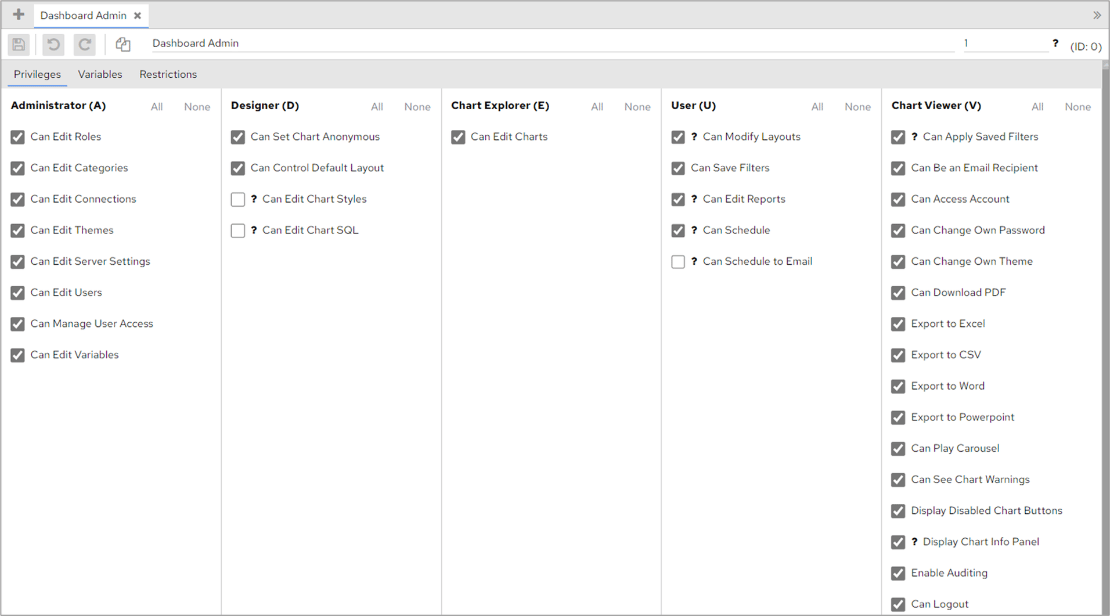
 Add icon on the Roles tab After adding a new role, give it a title, which must be unique. Role title field In the Privileges section, select the privileges that you want to apply to the role. You may notice that some privileges have a related privilege. For example, if you hover over Can Control Default Layout in the Designer section you will notice that Can Modify Layouts is also highlighted in the User section. If you then select Can Control Default Layout, Can Modify Layouts will also be selected. Privileges section with related privileges highlighted However, you can select a privilege in the User section, for example Can Modify Layouts, without also having to select Can Control Default Layout. After entering a name for the role and selecting the privileges, click the Save icon.