- Edit flow settings
- Add, edit, and remove steps
- Add, edit, and remove flow questions
- Add, edit, and remove business rules to the flow, steps, and questions
- License and unlicense the flow
When you make changes to a flow, you must click save for the changes to be applied. It’s best practice to save the flow regularly while you’re working on it.
What’s what in the flow designer
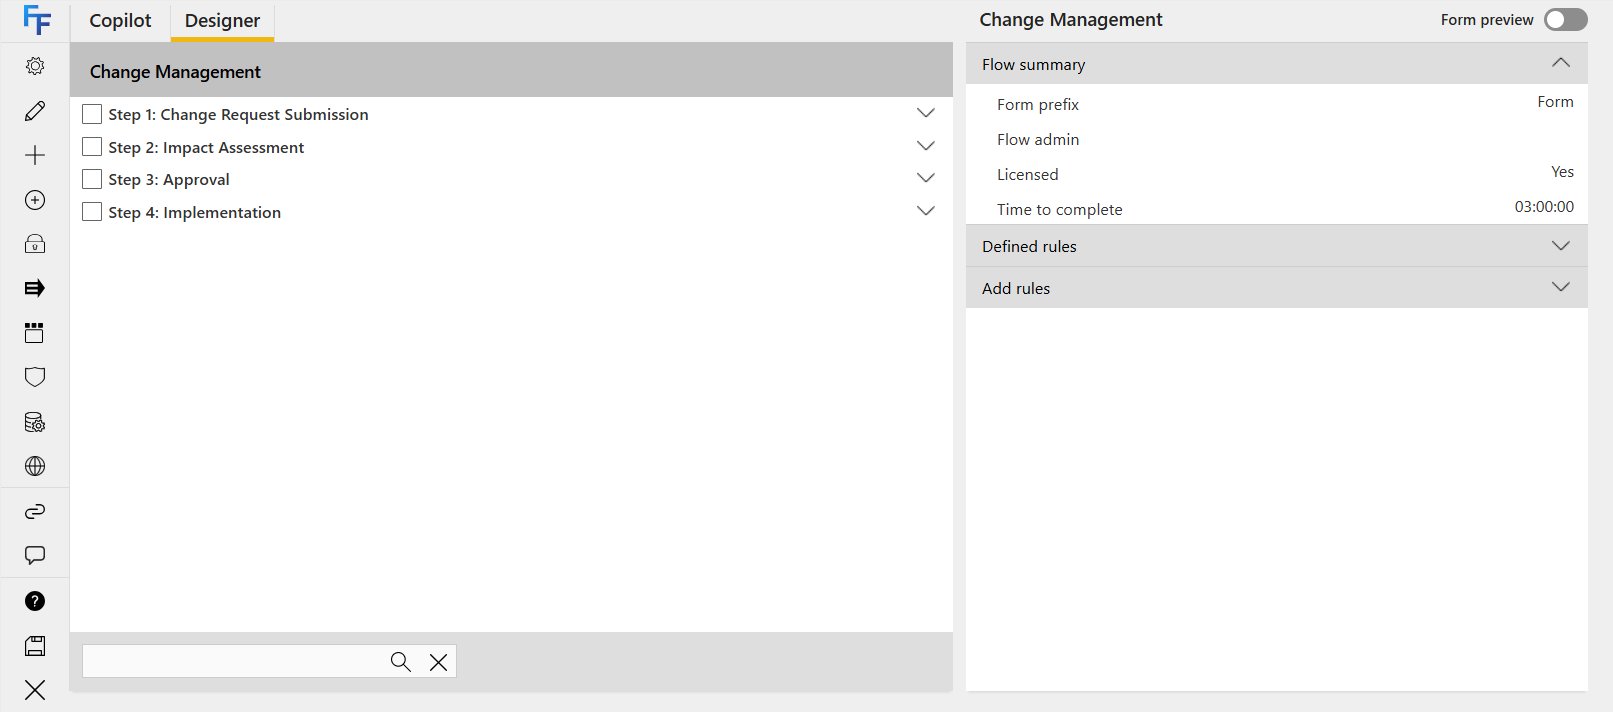
There are many actions within the flow designer:- The first part of the screen is the flow itself. At the very top you see the flow’s name. Below that you’ll see steps (in bold); they all have a check-box beside them.
- A parallel group is highlighted in blue and contains the words “parallel group” as part of the name. The questions within each step are indented and also have check-boxes beside them. You can use drag-and-drop to move steps and questions around.
- Use the arrows to expand or collapse the contents of a flow, step, or parallel group.
- Click X to exit the flow. Any changes you haven’t saved will be lost.
- The options panel is split into four sections and is context sensitive. The options vary depending on whether you’ve selected the flow, a step, a parallel group, or a question. This is described in more detail below.
- Whenever you make changes to the flow, remember to click save if you want to submit the changes; alternatively click close (this won’t save any unsaved changes, but you’ll be prompted to confirm, to avoid accidentally closing the flow designer).
- You can use the search box to search rules and questions by their names or codes (for example: Question - Holiday Request Details, Rule - Hide Step Date). Note: searching for footer questions within a repeating table isn’t supported.
Toolbar
The first part of the options panel is a toolbar:| Icon | Name | Details | Flow | Step | Parallel step | Question |
|---|---|---|---|---|---|---|
 | Settings | View and modify the flow or step settings. This includes general settings, custom layouts, etc. Note: it also modifies the step properties. | x | x | ||
 | Properties | View or modify the flow or question properties. | x | x | ||
 | Unlicense flow | Click to unlicense the flow. The flow remains in the system but can’t be used for submitting new forms. | x | |||
 | Activate flow | Click to activate the flow. Only active flows can be used for submitting new forms. | x | |||
 | Set execution in series | This option allows you to set the rule execution order to series, so rules execute one-by-one rather than all at once. If you see this icon, rules are currently executing in parallel. | x | x | x | |
 | Set execution in parallel | This option allows you to set the rule execution order to parallel, so rules execute at the same time rather than one-by-one. If you see this icon, rules are currently executing in series. | x | x | x | |
 | Remove checked item(s) | Used to remove steps and/or questions. Check the relevant items first, then click X in the toolbar. The items are removed from this flow, but can still be used elsewhere. | x | x | x | |
 | Add a new step / Add a new question | Click directly on the + step button to add a new step. | x | |||
 | Flow: Add existing step(s) / Add a parallel group. Step: Add existing question(s) | Adding existing steps will also add all questions that are inside that step. | x | x | ||
 | Disable | Check the relevant items first, then click disable in the toolbar. The items are shown but not editable when creating a form. You can use this to set their default value (for example, current user or current date), and then their value can’t be changed. | x | x | ||
 | Enable | Check the relevant disabled items first, then click enable in the toolbar. The items become editable when creating a form again. | x | x | ||
 | Hide | Check the relevant items first, then click hide in the toolbar. This will hide a step or question so they don’t appear in the form. The answer to a question might trigger other questions or steps to be irrelevant, in which case you might decide to hide them. | x | x | ||
 | Show | By default, all steps and questions show. However, if you’ve hidden a step or question and want to show it again, select the check-box beside the relevant item and click show. | x | x | ||
 | Required | By default, all questions are set to not be required; you can toggle the required setting using this icon. | x | |||
 | Add flow steps into parallel group | Used to add steps into a parallel group. Check the relevant steps, then click add flow steps into parallel group. | x | |||
 | Remove parallel steps from group | Used to remove steps from a parallel group. Check the relevant steps, then click remove parallel steps from group. | x | |||
 | Open Visual Form Designer | Used to open up the Visual Form Designer | x | |||
 | Open Security Wizard | Used to open the Security Wizard | x | |||
 | Open CX* | Used to open the CX panel to manage the accessibility of the form. | x |
* these icons will only appear if the feature has been activated on the site
Summary
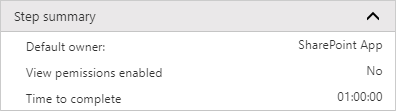
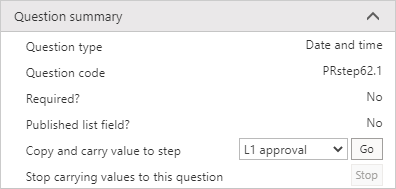
The second part of the options panel is the summary. The summary varies depending on whether you’re viewing a flow, step, question, or sub-question in a repeating table. The summary is always read-only and only displays high-level information.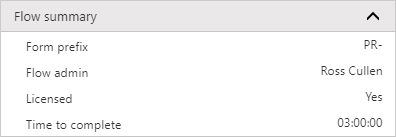
Defined rules
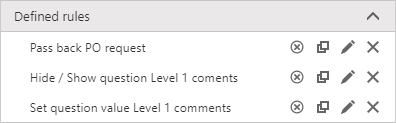
The defined rules are context specific, so what you see relates directly to the flow, step, or question. If no rules have been defined for the relevant item, nothing will appear when you click on the drop-down arrow. You can do the following directly from this menu:- disable/enable rule
- copy rule
- edit rule
- delete rule
Add rules
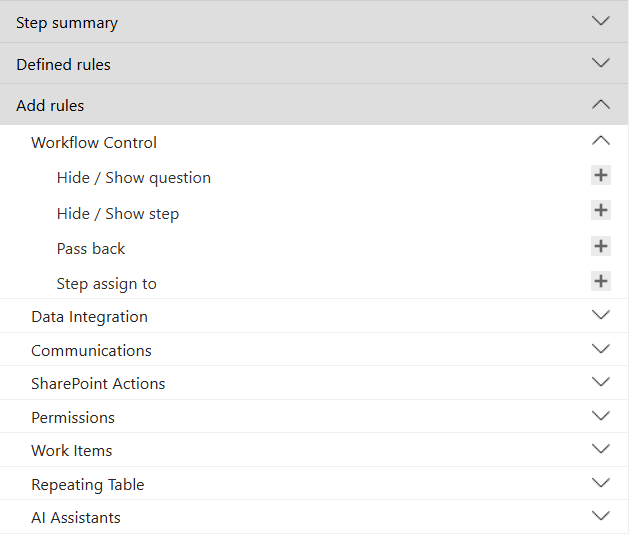
You can Add rules to a flow, step, or question. The possible rules are context specific, so for a flow or step you’ll see six categories: workflow control, data integration, communications, SharePoint actions, permissions, and repeating table. For a question, you’ll see five categories: workflow control, data integration, SharePoint actions, permissions, and repeating table. Shown below, when adding a rule to a step, click + beside the relevant rule type to start adding a new rule. Once complete, this rule will appear in the defined rules list.