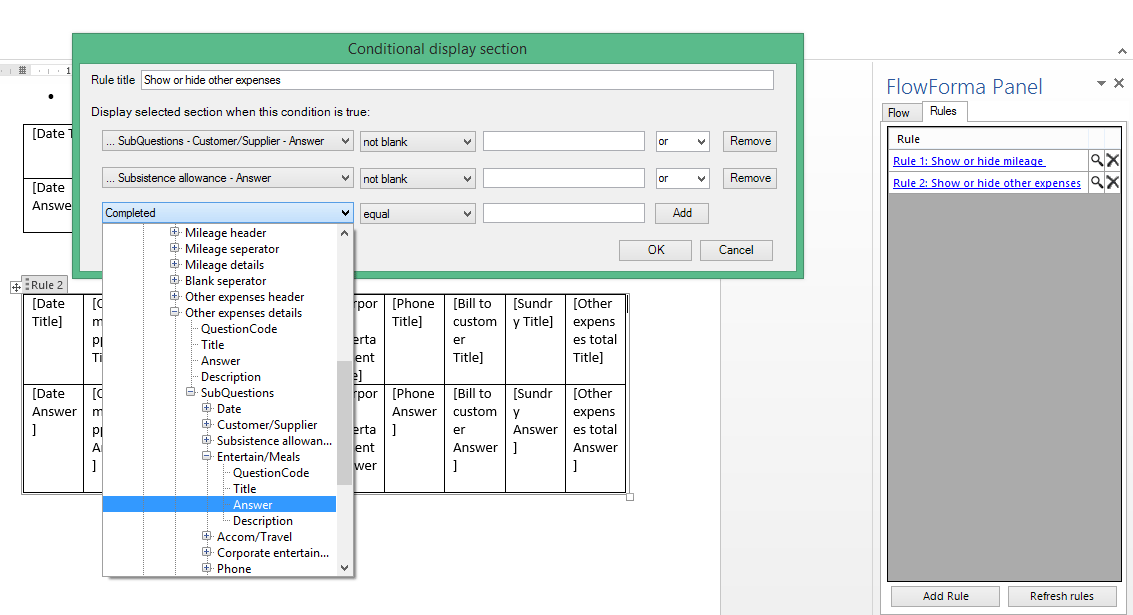
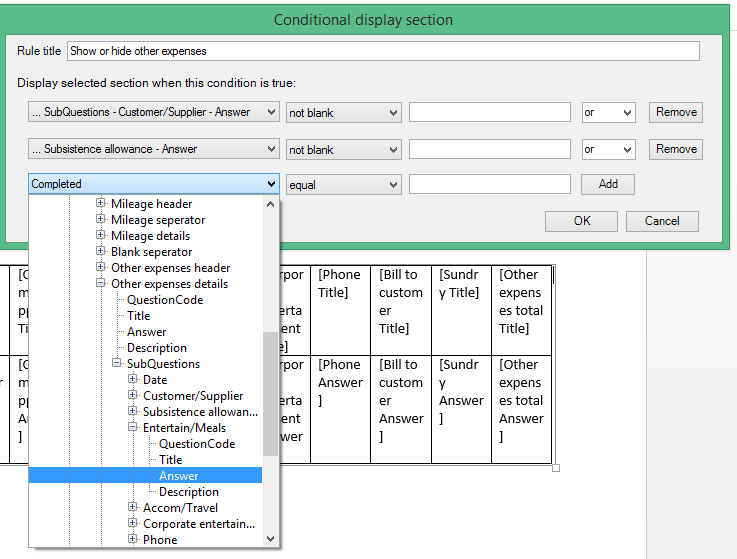
The FlowForma document generator lets you dynamically display information in a document template by using rules. These rules are based on the flow’s attributes: if the conditions are met, the selected attribute is displayed in the generated document. By default, attributes inserted in a document are displayed in the generated document.

Create/edit a rule

To create a rule, open the document template and select the Rules tab from the panel. If the document contains rules, they’re displayed in this section, as shown below. Click a rule to open the rule editor panel. To create a new rule, select the attribute you want to display and then click Add rule. In the rule editor panel, enter a name for the rule and then set the required conditions.
  • In the first section of the condition, select the flow attribute from the drop-down list.
  • In the second section, select a condition from the drop-down list: is blank, not blank, equal, does not equal, contains, does not contain, greater than, or less than.
  • In the third section, enter the value for the condition.
By default you have one row for conditions. You can add more by clicking Add. When you have more than one condition, the editor shows another section where you can select “and” or “or”. These options let you define whether just one or all of the conditions have to be met for the rule to be executed. The rules tab in the panel The rule editor panel Once you’ve finished editing the rule, click OK. The rule is saved and displayed in the rules list. When you click an attribute, any rules applied to it are displayed in a container showing the rule number. Rules applied to an attribute, shown with the rule number