Steps to create a new flow
- Access the Flow Designer
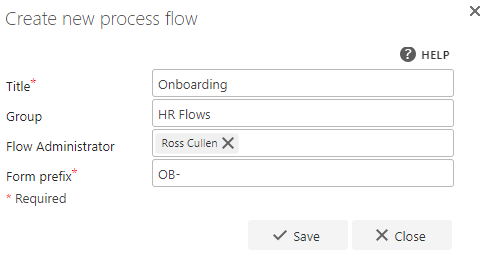
- Click Create new process flow from the quick launch panel.
- Fill in the following details
- Flow title: Provide a unique title for the flow. This title appears in lists and helps distinguish it from other flows.
-
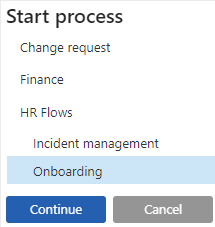
Group: Assign the flow to a group (e.g., “Finance” or “HR”) or create a new group by entering a unique group name. Leave this blank if no grouping is required.
- Example: “Onboarding” and “Incident management” grouped under “HR Flows.”
- Flow administrator: Specify a user or group as the flow administrator. The administrator can make changes to the flow, view content, and delegate any step, even if they are not a FlowForma admin.
-
Form prefix: Add a prefix to categorize related forms, making them easier to identify in SharePoint lists. For instance, forms tagged under “OB-” appear with a title like “OB-123.”
- Save the flow
- Once the details are filled in, click OK.
Working with a flow
- Open the Flow Designer
- Click on the flow’s name (underlined when hovered) to open the Flow Designer for editing.