> ## Documentation Index
> Fetch the complete documentation index at: https://docs.flowforma.com/llms.txt
> Use this file to discover all available pages before exploring further.
# Parallel steps
> Group multiple flow steps into a parallel group so different users can complete their approvals and tasks simultaneously in any order.
Parallel steps allow multiple steps to be completed simultaneously by grouping them into a *parallel group*.
This is useful when:
* Multiple approvals are needed from different individuals.
* Tasks span across departments and can be completed in any order.
Each participant can submit their step independently without waiting for others in the group to complete theirs.
## Creating a parallel group
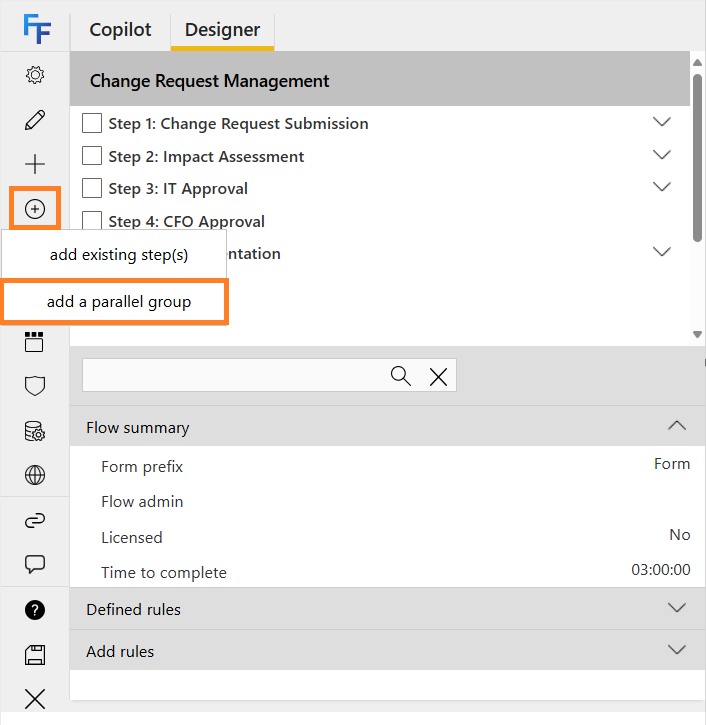
1. Open the **Flow Designer**.
2. Click the "Add existing step(s) or parallel group" icon and select **add a parallel group** from the menu.
 3. In the editor that appears, enter the following details:
* **Title**: Provide a name for the parallel group.
* **Assign To**: Assign the parallel group to a specific person or group.
3. In the editor that appears, enter the following details:
* **Title**: Provide a name for the parallel group.
* **Assign To**: Assign the parallel group to a specific person or group.
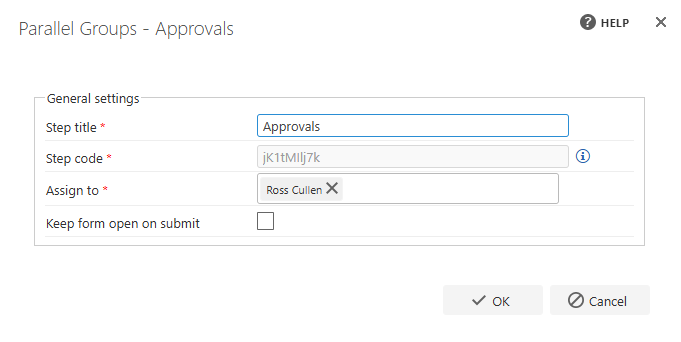 **Note**: Assigning the parallel group only applies to the container, not the steps within it.
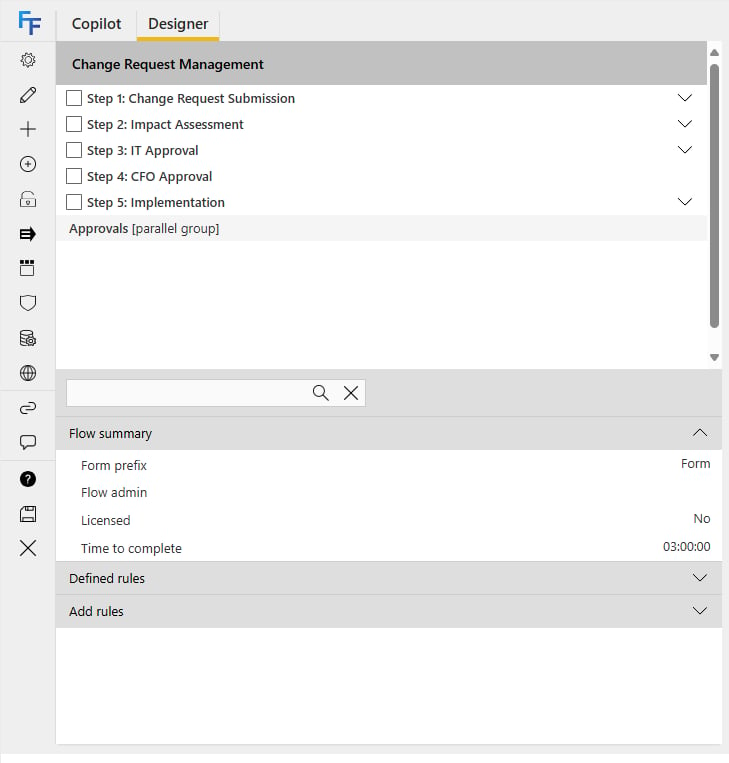
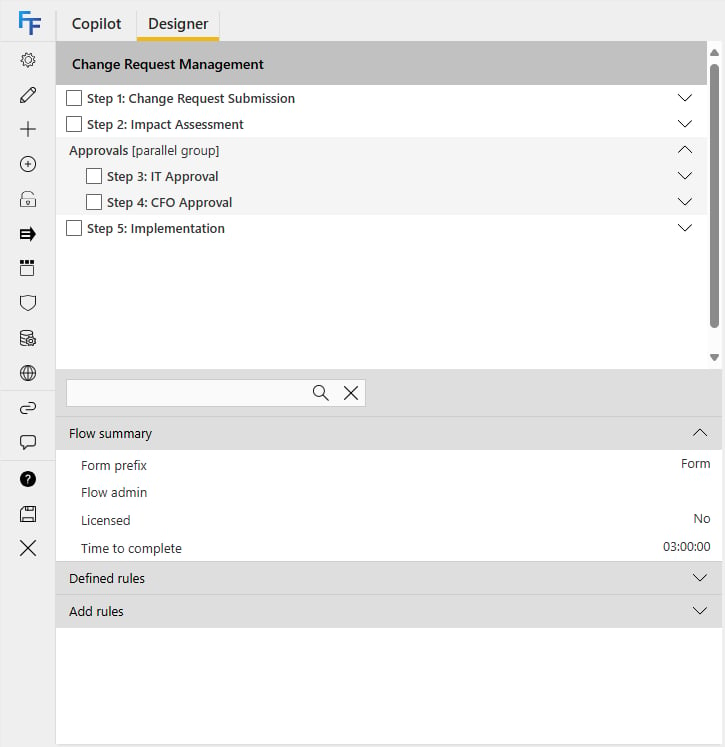
Once created, the parallel group appears in the Flow Designer highlighted and denoted with \[parallel group], making it easy to distinguish from regular steps.
**Note**: Assigning the parallel group only applies to the container, not the steps within it.
Once created, the parallel group appears in the Flow Designer highlighted and denoted with \[parallel group], making it easy to distinguish from regular steps.
 ## Adding steps to a parallel group
1. Select the steps you want to add to the parallel group by checking the checkbox next to each step.
2. Select the parallel group by clicking its title in the Flow Designer.
3. Click the "Add flow steps into the parallel group" icon from the toolbar.
## Adding steps to a parallel group
1. Select the steps you want to add to the parallel group by checking the checkbox next to each step.
2. Select the parallel group by clicking its title in the Flow Designer.
3. Click the "Add flow steps into the parallel group" icon from the toolbar.
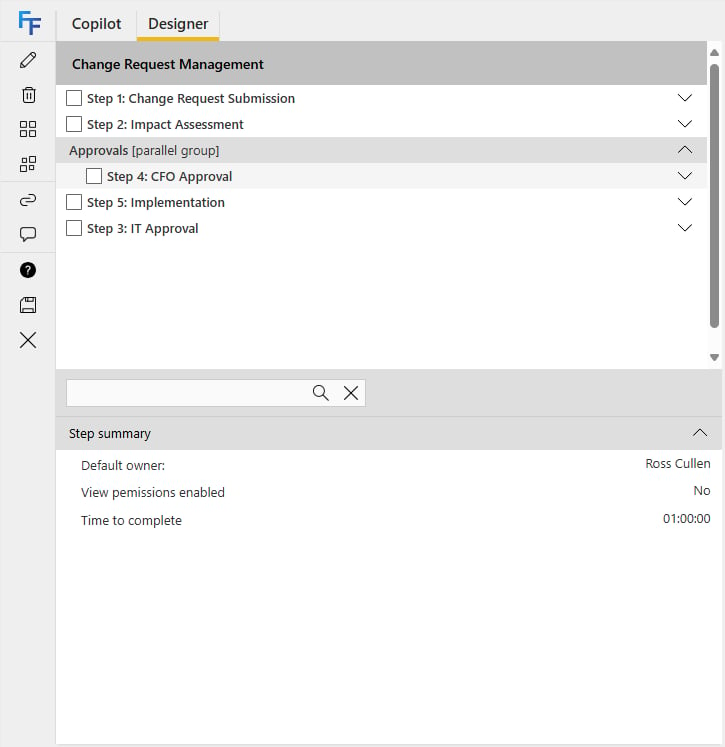
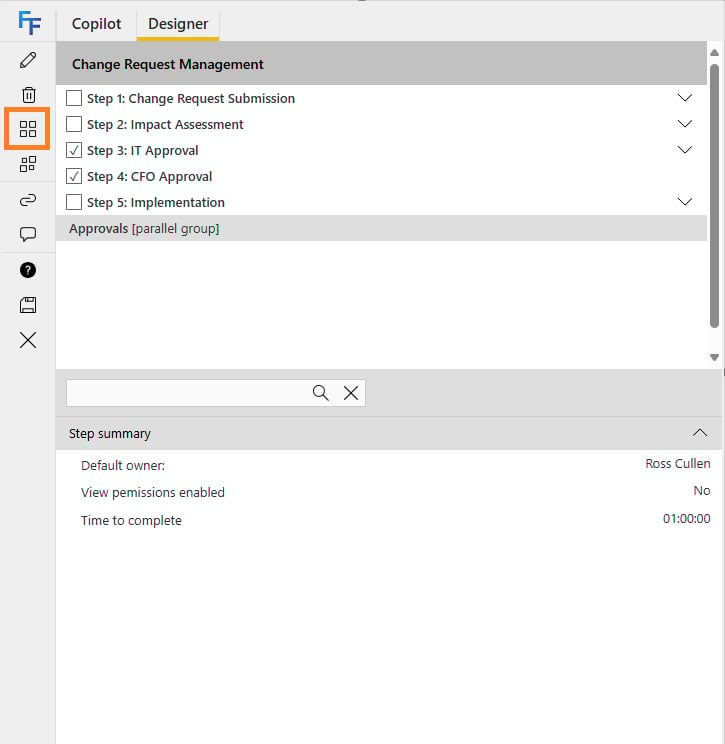 4. The steps are then inserted into the parallel group, and you can place the parallel group in the order required.
 ### Removing steps from a parallel group
1. Click the parallel group's tab and expand it to view its steps.
2. Select the steps to remove by checking the checkbox next to each step.
3. Use the toolbar to select **Remove parallel steps from group**.
4. The steps are removed from the parallel group but remain in the flow as individual steps.
### Removing steps from a parallel group
1. Click the parallel group's tab and expand it to view its steps.
2. Select the steps to remove by checking the checkbox next to each step.
3. Use the toolbar to select **Remove parallel steps from group**.
4. The steps are removed from the parallel group but remain in the flow as individual steps.
 ### Editing a parallel group
1. Select the parallel group in the Flow Designer.
2. Use the toolbar to select **Edit parallel step item**.
3. Modify the title, step code, or assigned user/group as needed.
### Removing a parallel group
1. Select the parallel group in the Flow Designer.
2. Use the toolbar to select **Remove parallel step from flow**.
**Note**: Removing a parallel group does not delete the steps within it. The steps will remain in the flow as standalone steps.
## Parallel step collapsing
FlowForma provides an option to enable parallel step collapsing in the **Flow Settings**. When enabled, this feature lets users toggle between displaying all steps in a parallel group or only the steps assigned to them.
### How it works
* When creating a form, a "parallel group box" appears.
* By default, only the steps assigned to the current user are visible.
* Users can expand the parallel group box to view all steps within the group.
## Submitting parallel steps
Steps within a parallel group can be assigned to the same or different users/groups. The form will not progress beyond the parallel group until all steps within the group are completed.
### Key points
1. If multiple steps in the parallel group are assigned to the same user:
* Submitting one step will submit all steps assigned to that user.
* Mandatory questions must be completed to prevent accidental submission.
2. Steps with incomplete mandatory questions will not be submitted until all requirements are fulfilled.
By leveraging parallel steps, FlowForma enables teams to work on multiple parts of a process simultaneously, enhancing efficiency and collaboration.
### Editing a parallel group
1. Select the parallel group in the Flow Designer.
2. Use the toolbar to select **Edit parallel step item**.
3. Modify the title, step code, or assigned user/group as needed.
### Removing a parallel group
1. Select the parallel group in the Flow Designer.
2. Use the toolbar to select **Remove parallel step from flow**.
**Note**: Removing a parallel group does not delete the steps within it. The steps will remain in the flow as standalone steps.
## Parallel step collapsing
FlowForma provides an option to enable parallel step collapsing in the **Flow Settings**. When enabled, this feature lets users toggle between displaying all steps in a parallel group or only the steps assigned to them.
### How it works
* When creating a form, a "parallel group box" appears.
* By default, only the steps assigned to the current user are visible.
* Users can expand the parallel group box to view all steps within the group.
## Submitting parallel steps
Steps within a parallel group can be assigned to the same or different users/groups. The form will not progress beyond the parallel group until all steps within the group are completed.
### Key points
1. If multiple steps in the parallel group are assigned to the same user:
* Submitting one step will submit all steps assigned to that user.
* Mandatory questions must be completed to prevent accidental submission.
2. Steps with incomplete mandatory questions will not be submitted until all requirements are fulfilled.
By leveraging parallel steps, FlowForma enables teams to work on multiple parts of a process simultaneously, enhancing efficiency and collaboration.